How to sort sprites by Y axis in Unity 2D
In 2D games you usually want to create an illusion of 3D, and there is no better way than to modify the sorting order of your sprites:

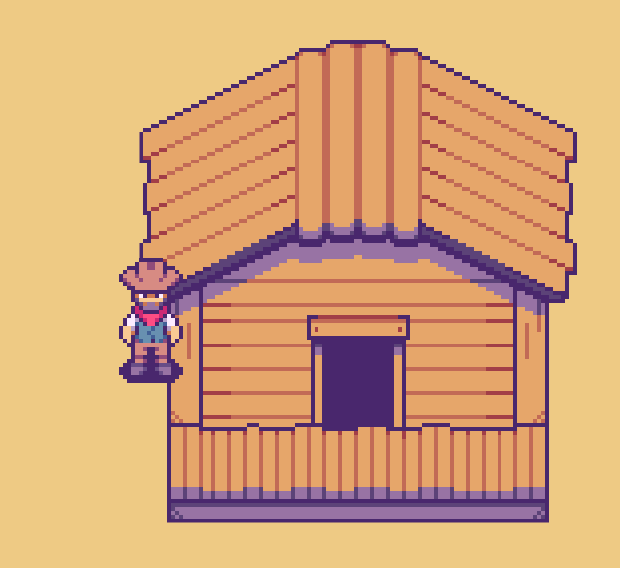
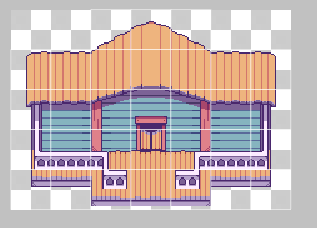
Player is rendered on top of the porch and the “front” of the house, while behind the railing. We also want the player to be rendered behind the roof of the house when walking behind the house (not shown in the gif image).
Assets used: bakudas.itch.io/generic-oldwest-pack
You can download the full project with all the examples if you are my patron: LINK
Sorting Layers
Unity provides us with an easy way to sort the sprites on the screen in accordance to the sorting layers :
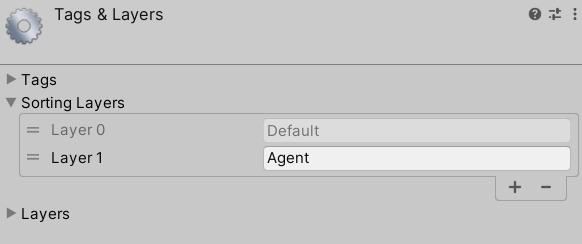
“Agent” layer will be shown on TOP of the “Default” layer.
All we need to do is to assign the sorting layers: “Agent” to the player and “Default” to the house right?

If we want to allow the player to walk behind the house to simulate 3d setting sorting layers will not be enough.
*House has on it a box collider 2D to prevent the player from walking into a wall but it ends near the lower part of the roof.

As you can see above we a way to dynamically determine where is the player in relation to the house to render both sprites correctly. We can use Y axis to determine it.
Transparency Sort Mode
Lucky for us unity allows us to easily set up this kind of sorting through by going to the:
Standard Rendering Pipeline:
Top menu -> Edit -> Project Settings -> Graphics
URP:
The setting is in the Renderer 2D: Create -> Rendering -> URP -> 2D Renderer

Select “Custom Axis” from the list.
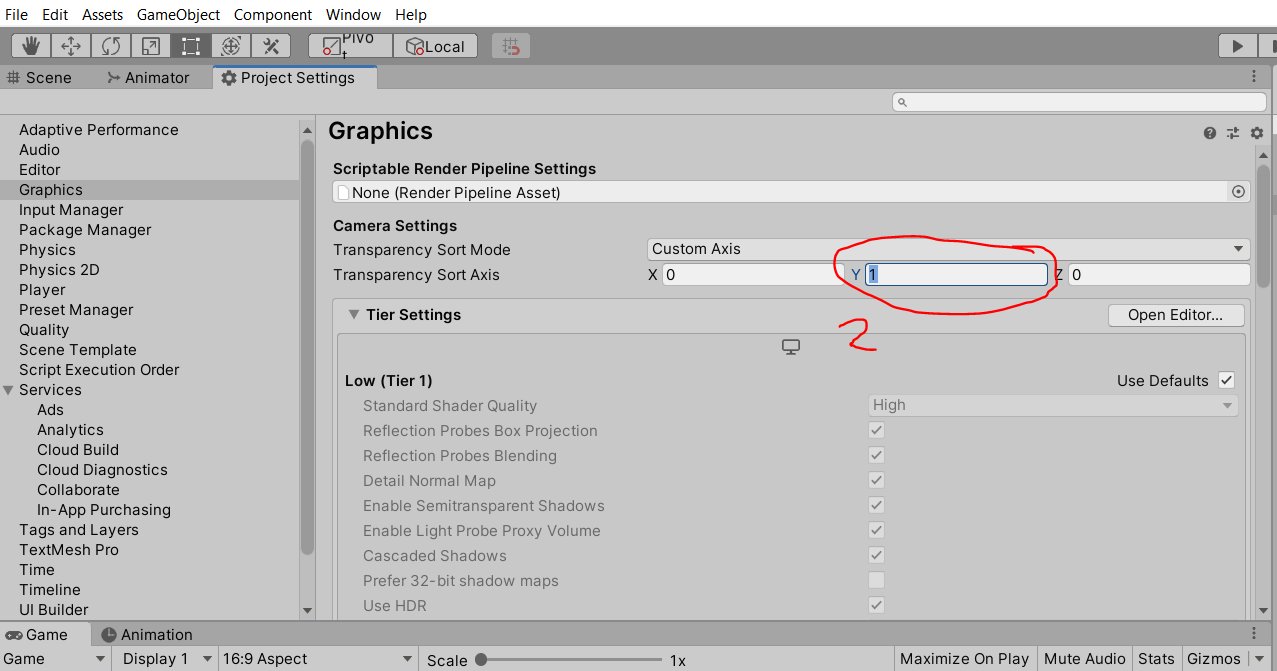
Since we want to use Y axis for the rendering we set it to 1.
Now this is not all. To use this setting we need to add Sorting Group component to the objects that needs to be sorted in accordance with this setup (for us this will be the house):
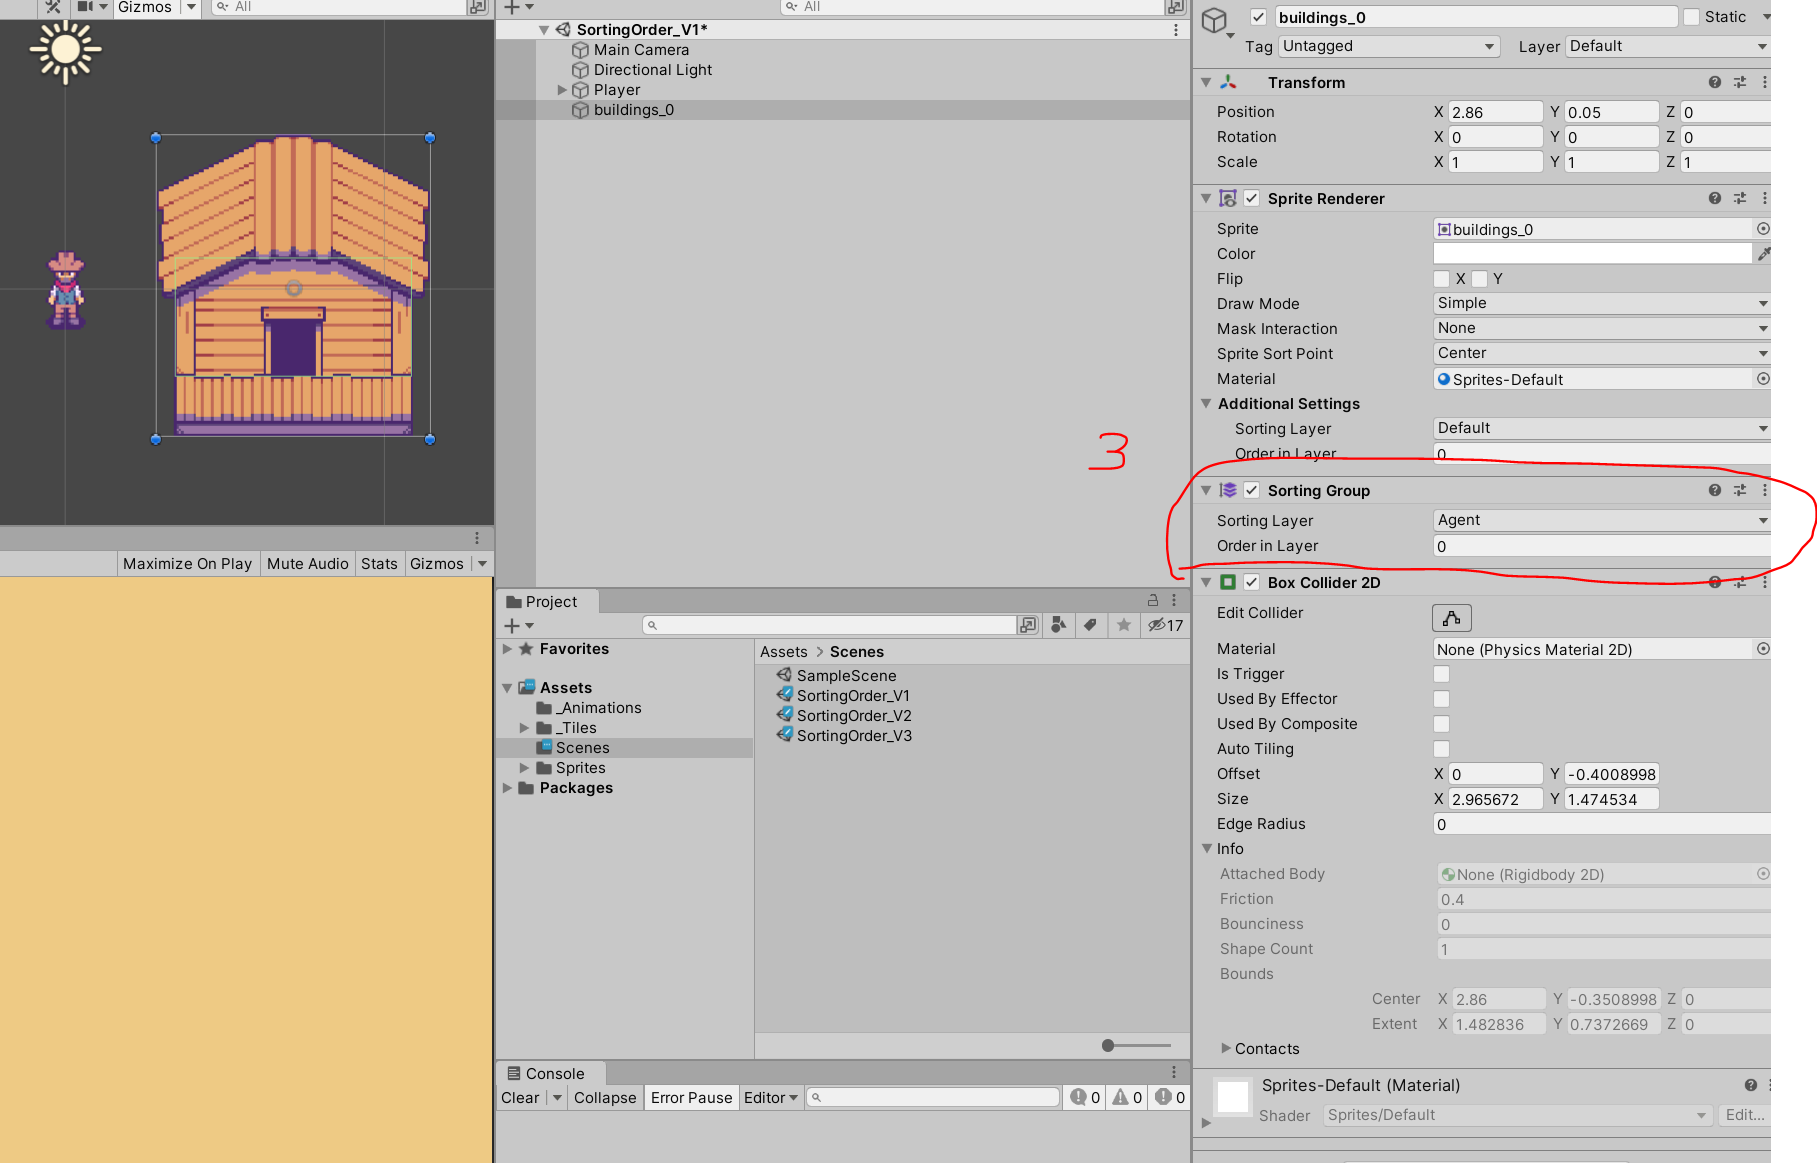

Since our player and houses are on the same layer (Sorting Group setup overrides the sorting layer settings in the Sprite Renderer! ) everything now should be rendered correctly:

Well there is still something not right. How exactly the Sorting Group component works?
Pivot Point
While I can’t find anything about it in the documentation of the Sorting Group component, we can read in the 2DSorting documentation:
Sprite Sort Point
By default, a Sprite
’s Sort Point is set to its Center, and Unity measures the distance between the camera’s Transform position and the Center of the Sprite to determine their render order during sorting. An alternate option is to set a Sprite’s Sort Point to its Pivot position in World Space. Select the Pivot option in the Sprite’s Sprite Renderer property settings and edit the Sprite’s Pivot position in the Sprite Editor.
One thing that I am sure of is that we can fixt the problem of the rendering of our player by modifying the pivot (for more complex sprites you man need to split the sprite into multiple module and set the pivot per module).
If we open Sprite Editor for the house sprite by selecting it in the Project Window:

Current setup. Pivo point is in the center

New Pivot position is a bit lower (y =~ 0.38).
After applying the pivot point change our sorting should work much better. Now the House will be much sooner rendered on TOP of our player:
*I do believe that the pivot point of the Player can influence the result so you may need to ensure that the player sprite has its pivot point in the correct spot somewhere near the centre.

Now it looks quire alright. Check the next image about the collider!

A bigger collider can also help with the hand of the player being rendered on top of the house wall.
I want a fence / railing to work correctly
RIght now it seems like we have solved all issues we can call it a day. Or can we? What about things like a railing or a fence:
Here the sprite contains the railing already placed on the wooden porch. We need to split those two and turn it all into tiles to use with the Tilemaps:

We split the house into:
-House tiles
-Railing tiles

We create 3 tilemaps: Building_Top, Building_Bottom and Building_Fence

Building_Top tilemap

Building_Bottom Tilemap

Building_Fence Tilemap
Now important part!
We need to set the TOP part to have the Sorting Group component on it:

Tilemap Renderer mode is set to “Chunk”. It is the default setting but its important to be so.
Next we need to set the Building_Fence tilemap a bit differently:
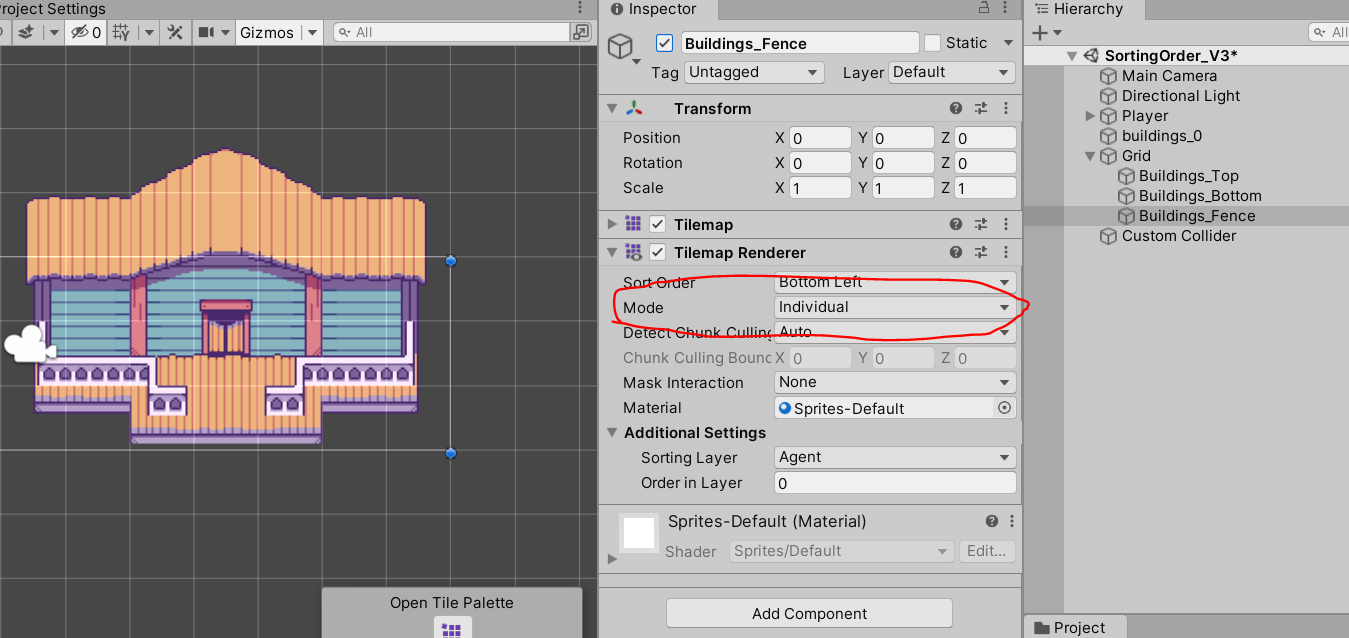
Individual Mode in the Tilemap Renderer allows us to take into account the sorting order of each separate tile.
Last thing is to set up the colliders:

I am quite sure that you can do a better job here.
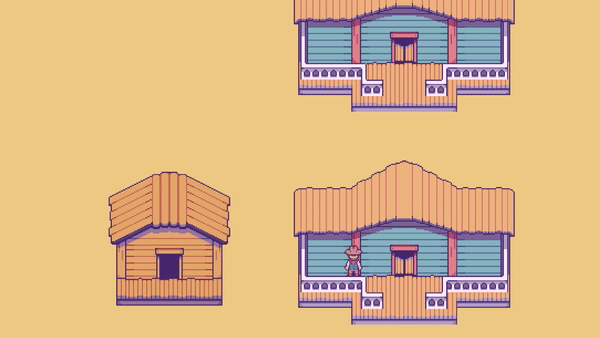
The result is quite satisfactory:

So job done right? Well.. not exactly. If I were to end here at some point you would add more building to your Builiding_Top tilemap and this would happen:

As you can see the sorting of the next building at the top doesn’t work at all.
Mixing the solutions
So we can either have a separate layer for each buildings TOP part or we can mix the solutions and use the fence as tiles to be sorted individually and we can put the building as a single sprite to be rendered using the Sorting Group:

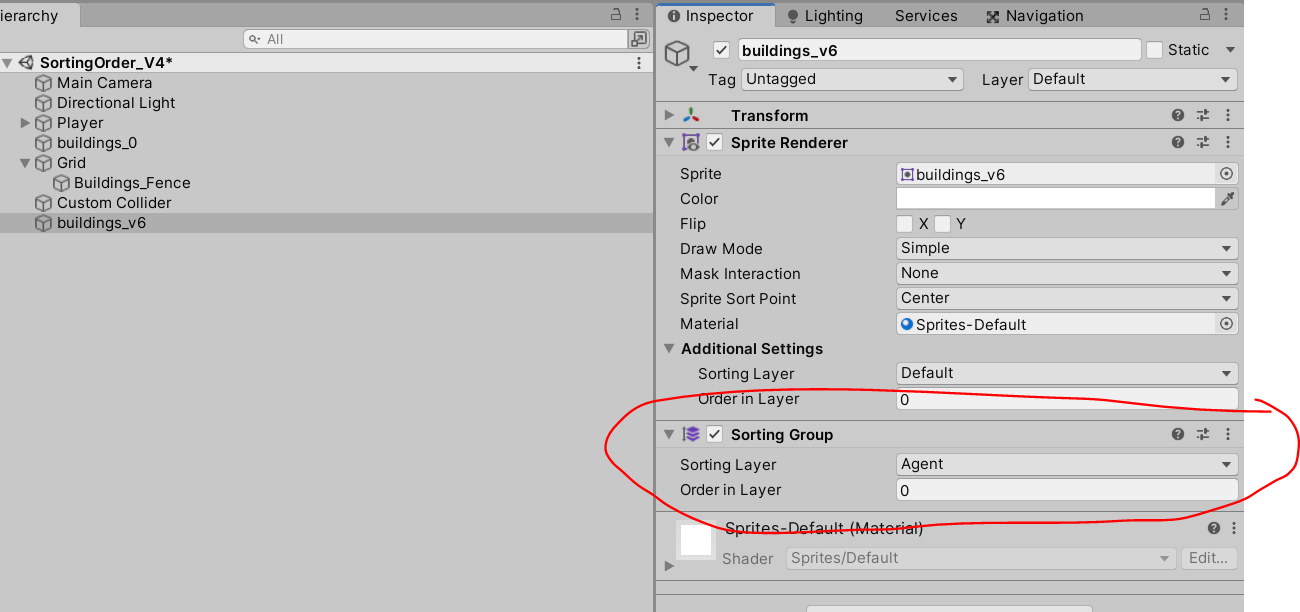
Finally we have a working solution:

If you enjoy this post please consider supporting me through Pateron
Want to learn more about making 2D games in Unity ?
If you want to learn more about Making 2D games in Unity check out my video courses:

You can also check my other tutorials on my YT channel:

If you agree or disagree let me know by joining the Sunny Valley Studio discord channel :)
Thanks for reading!
Peter