Curved World shader in Unity

We can quite easily create this curved world effect by creating a custom shader using Unitys shader graph. I will be using Unity 2021.3.1 (LTS) since this version (and Shader Graph version) allows to automatically expose more properties of a shader graph.
I will be working with the end project from my Minecraft World tutorial - https://youtu.be/leBl6q21-0I.
This shader tutorial is inspired by Daniel Santallas (@danielsantalla) shader
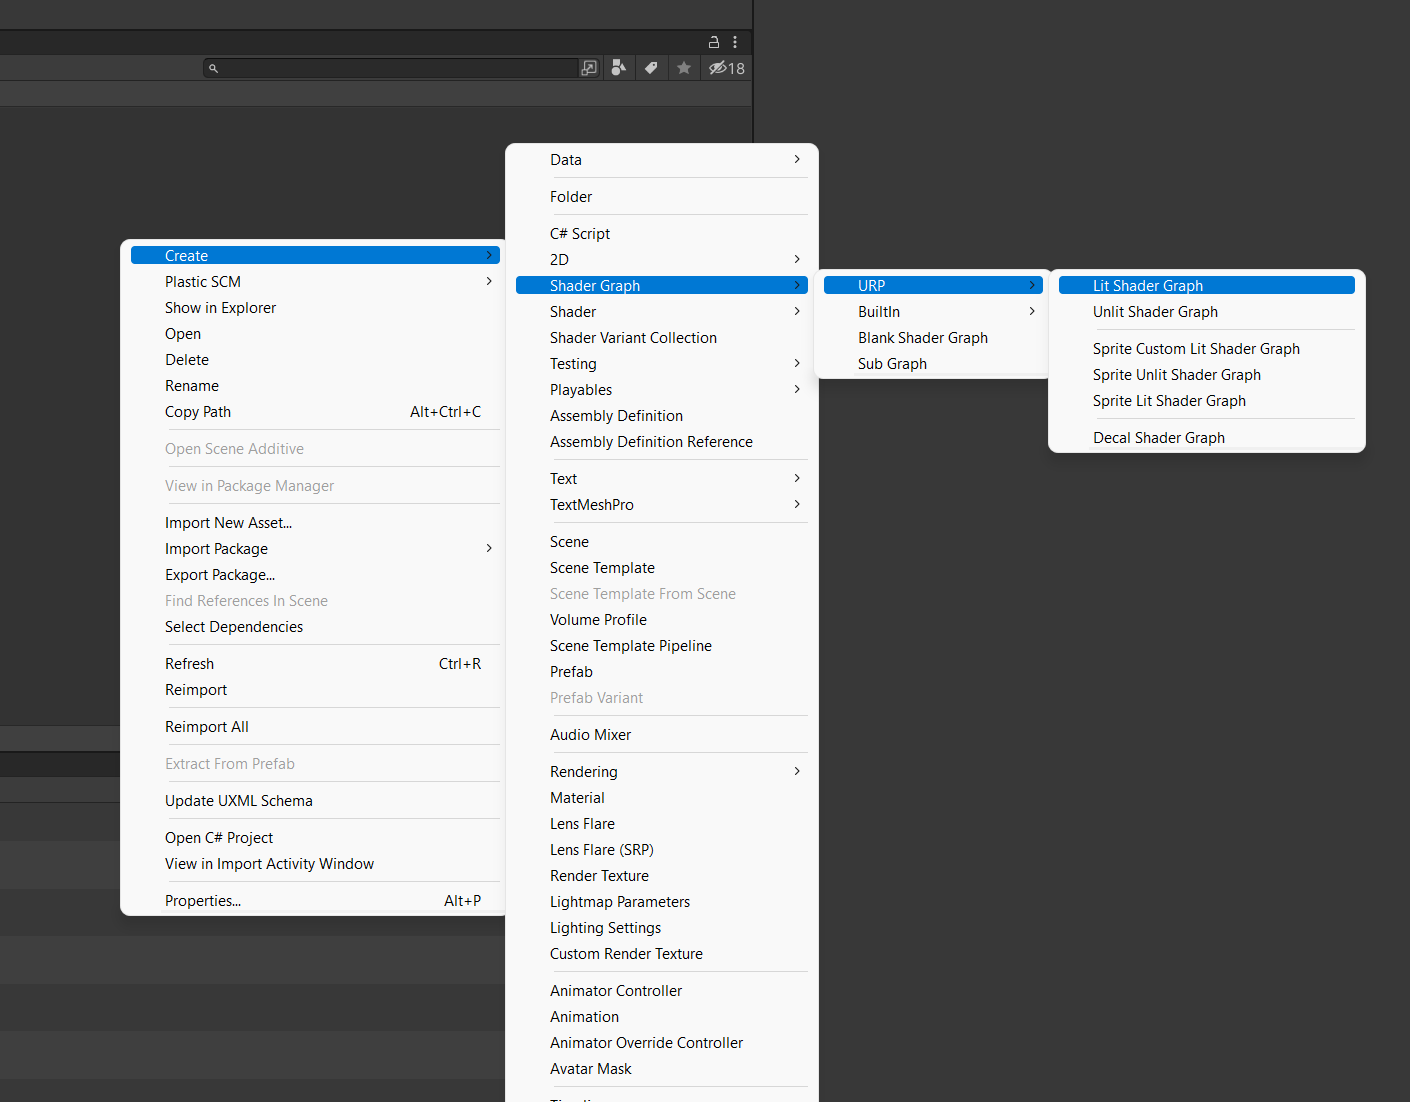
All we need to do is create a new Lit shader graph and double click it to open it up:
Shader
Step 1 - Get the vertex position in camera space (in relation to the camera position)
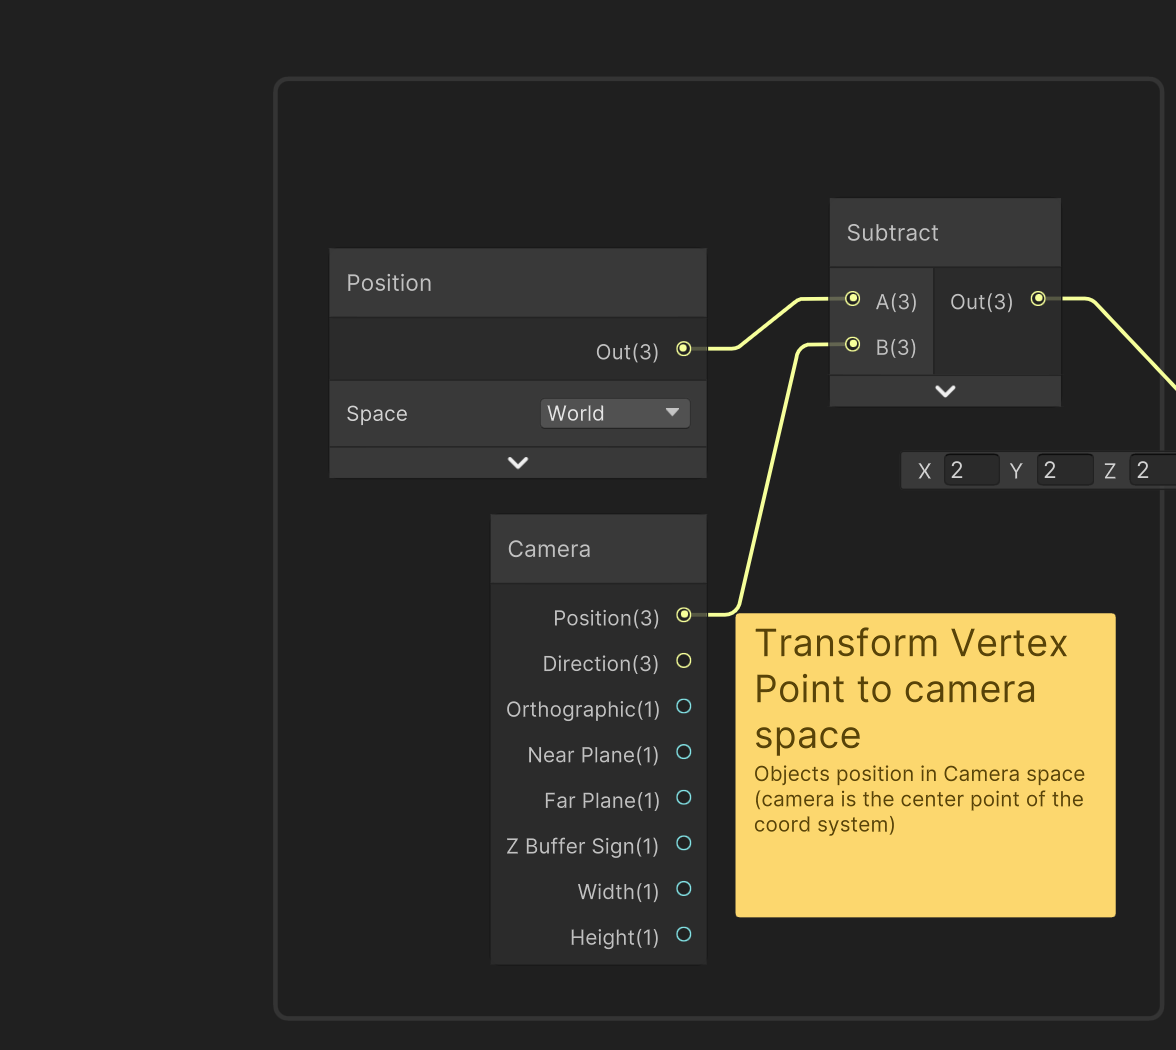
First we need to convert the world position of the vertex into the camera coordinate system.
By default both the camera and the vertex are somewhere in the world space:

We need to make the camera as the center of the coordinate system so that we can get the X/Z distance from the camera to the vertex that we want to modify. That is what this step in our shader does.

Step 2: Calculate curvature
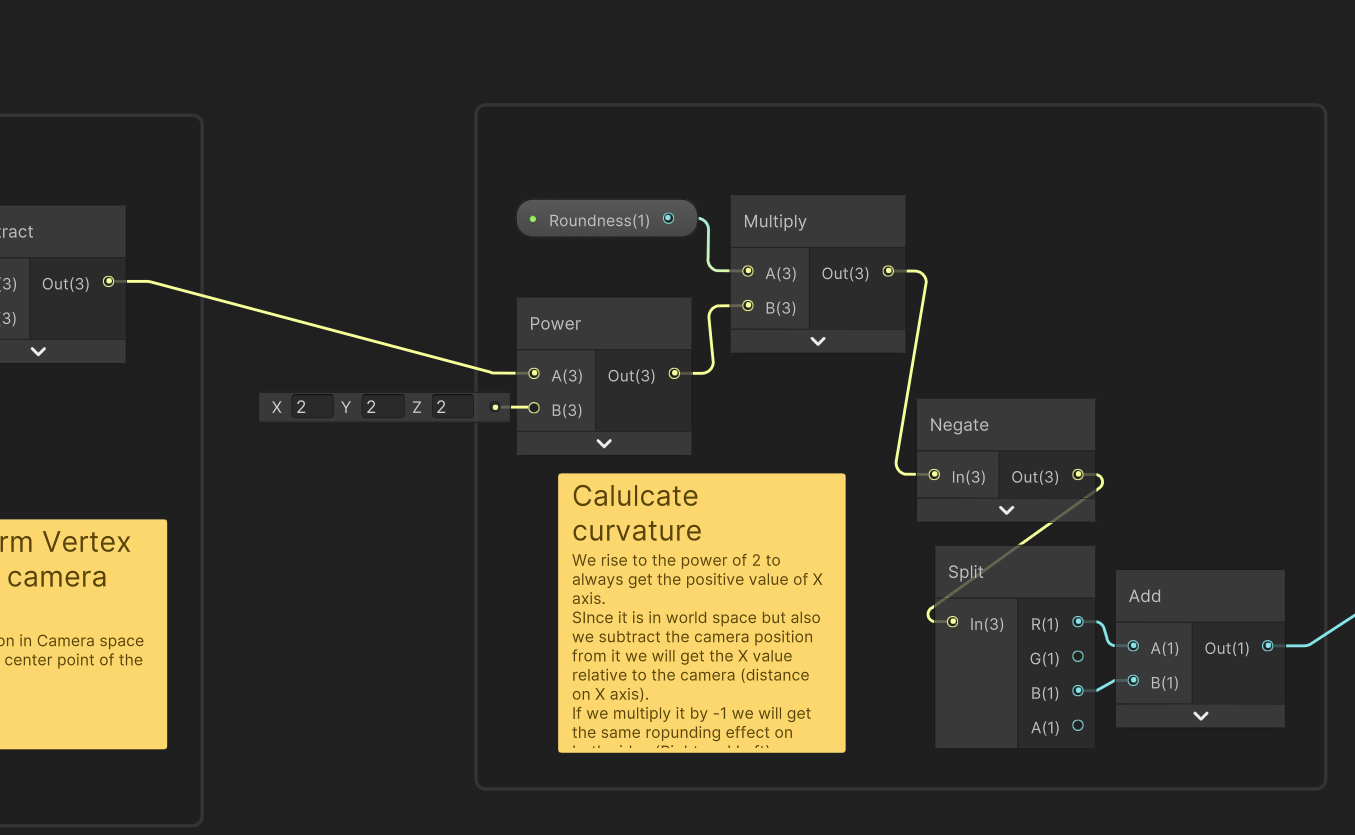
Here we will do 2 things:
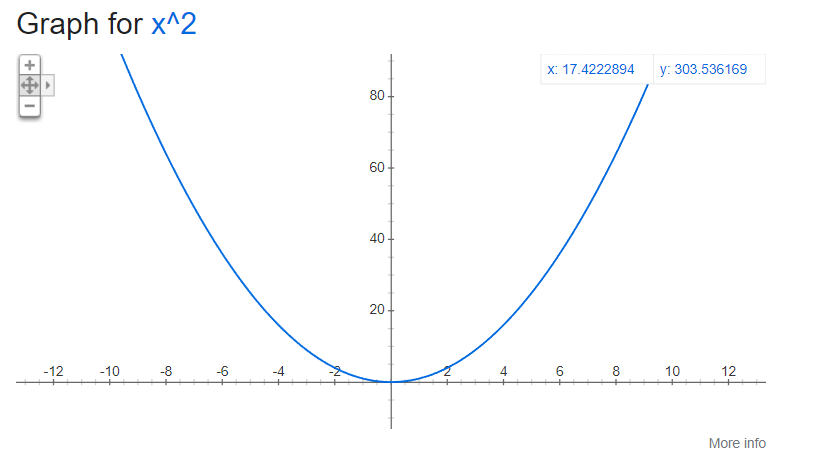
We will rise the X,Y,Z coordinates to the power of 2 so that we can later use those value to calculate the curvature to apply by modifying vertices Y position (next step). We could apply a different function but this way we will expect a smooth curvature just like the function y = x^2 itself shows
By rising the coordinates to the power of 2 we also mitigate the problem that the vertices to the left of the camera (if we only consider the XY plane) are negative and to mirror the curvature we need to get the absolute value. By rising the value to the power of 2 we fix the below situation as a side effect:

We also multiply the output value by Roundness parameter which is a float parameter that I set to around 0.008. You can create it using the blackboard tab in you shader graph:

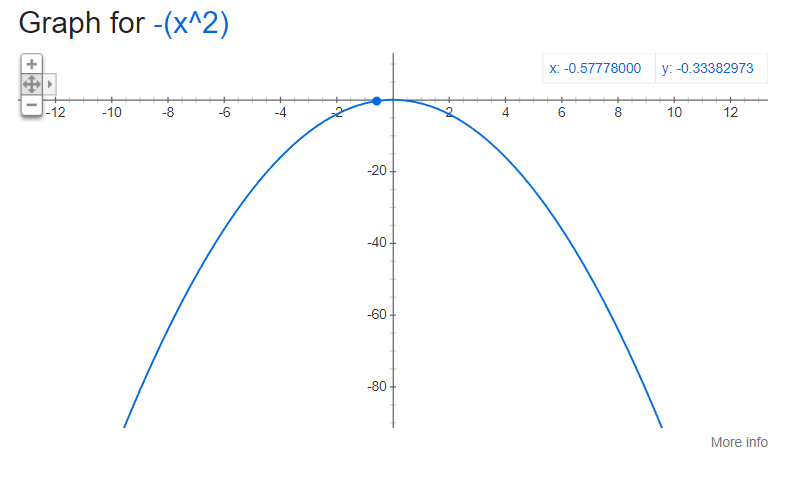
Last problem is that the curvature of the Y = X^2 goes up. That is why we use the NEGATE node.
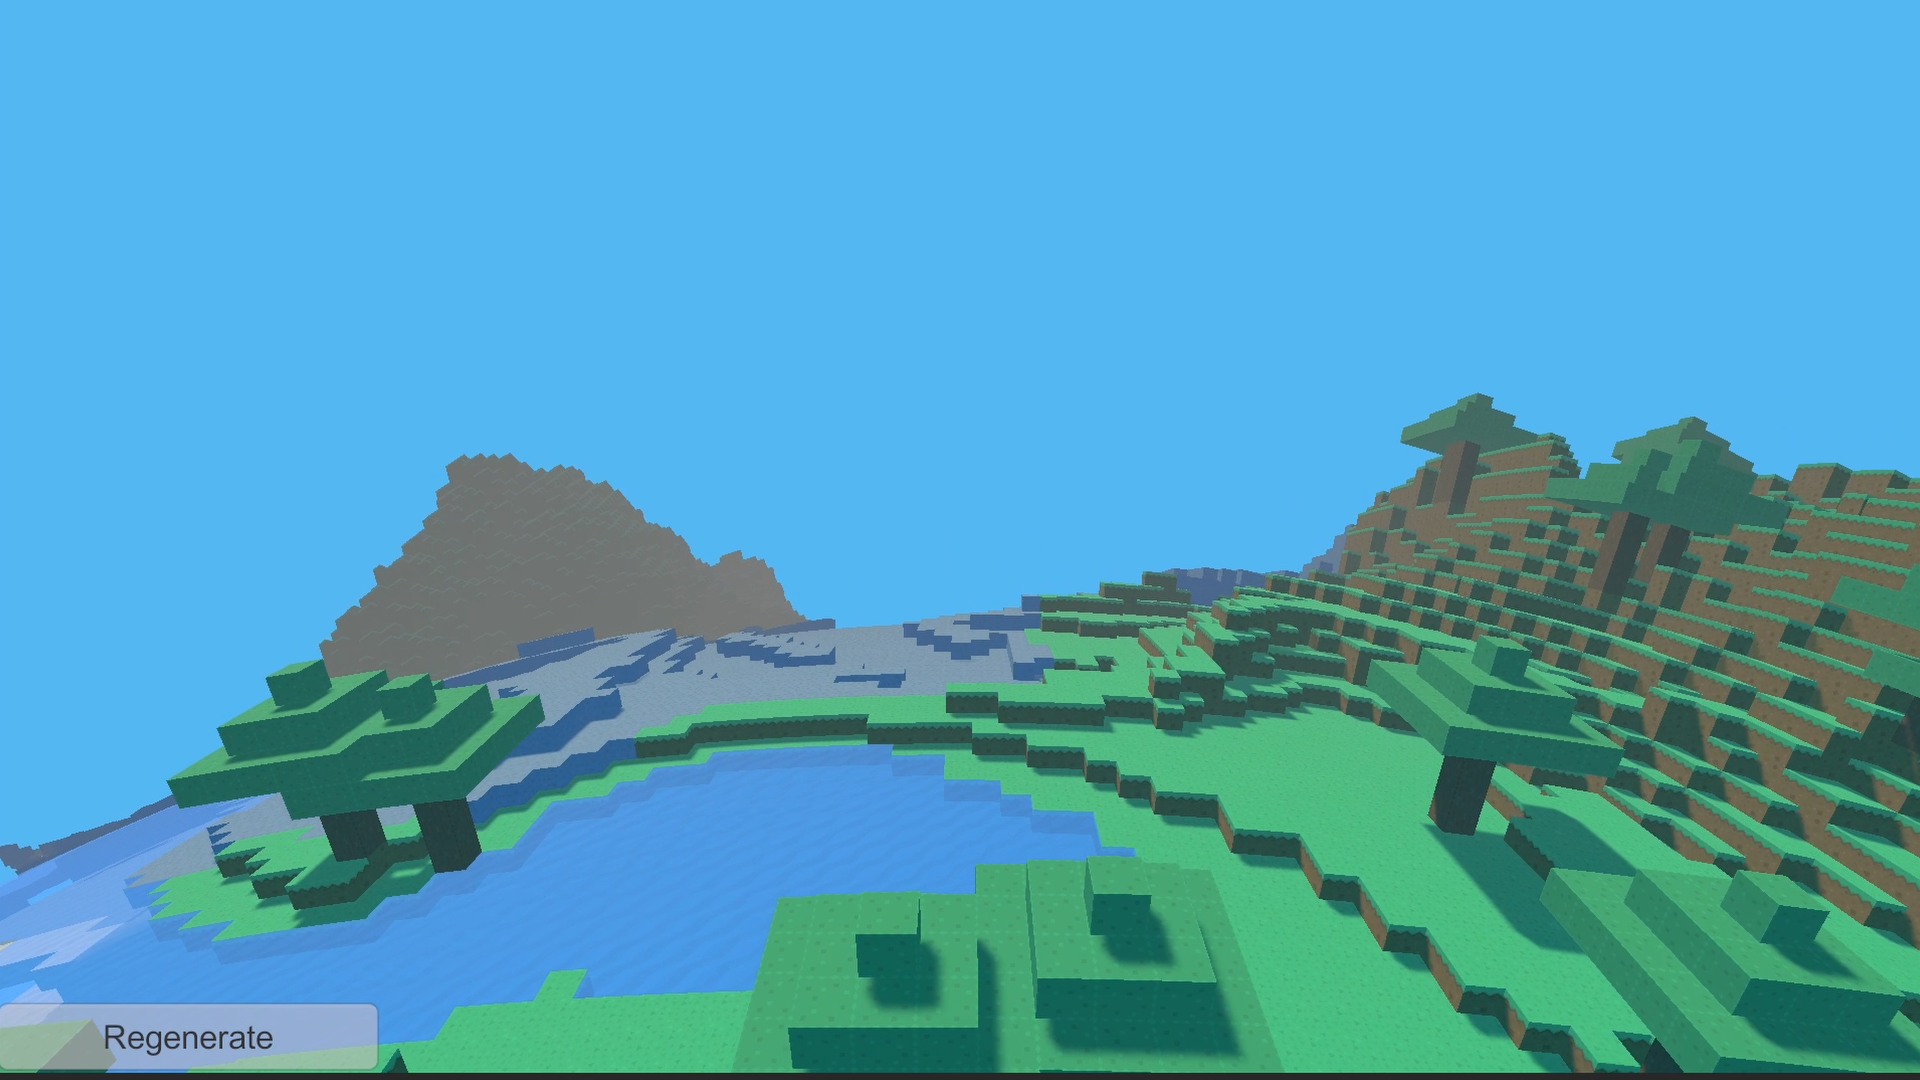
To create a planet like curved world we at the end add X and Z coordinates to use them both to modify the Y value of the position of the objects vertex (next step). The result will be a curved world wherever we look:

Are you enjoying this article so far?
Do you want to learn more about coding in Unity? Check out my OOP for Unity Devs video course and others !
Step 3: Applying the offset to Y coordinate

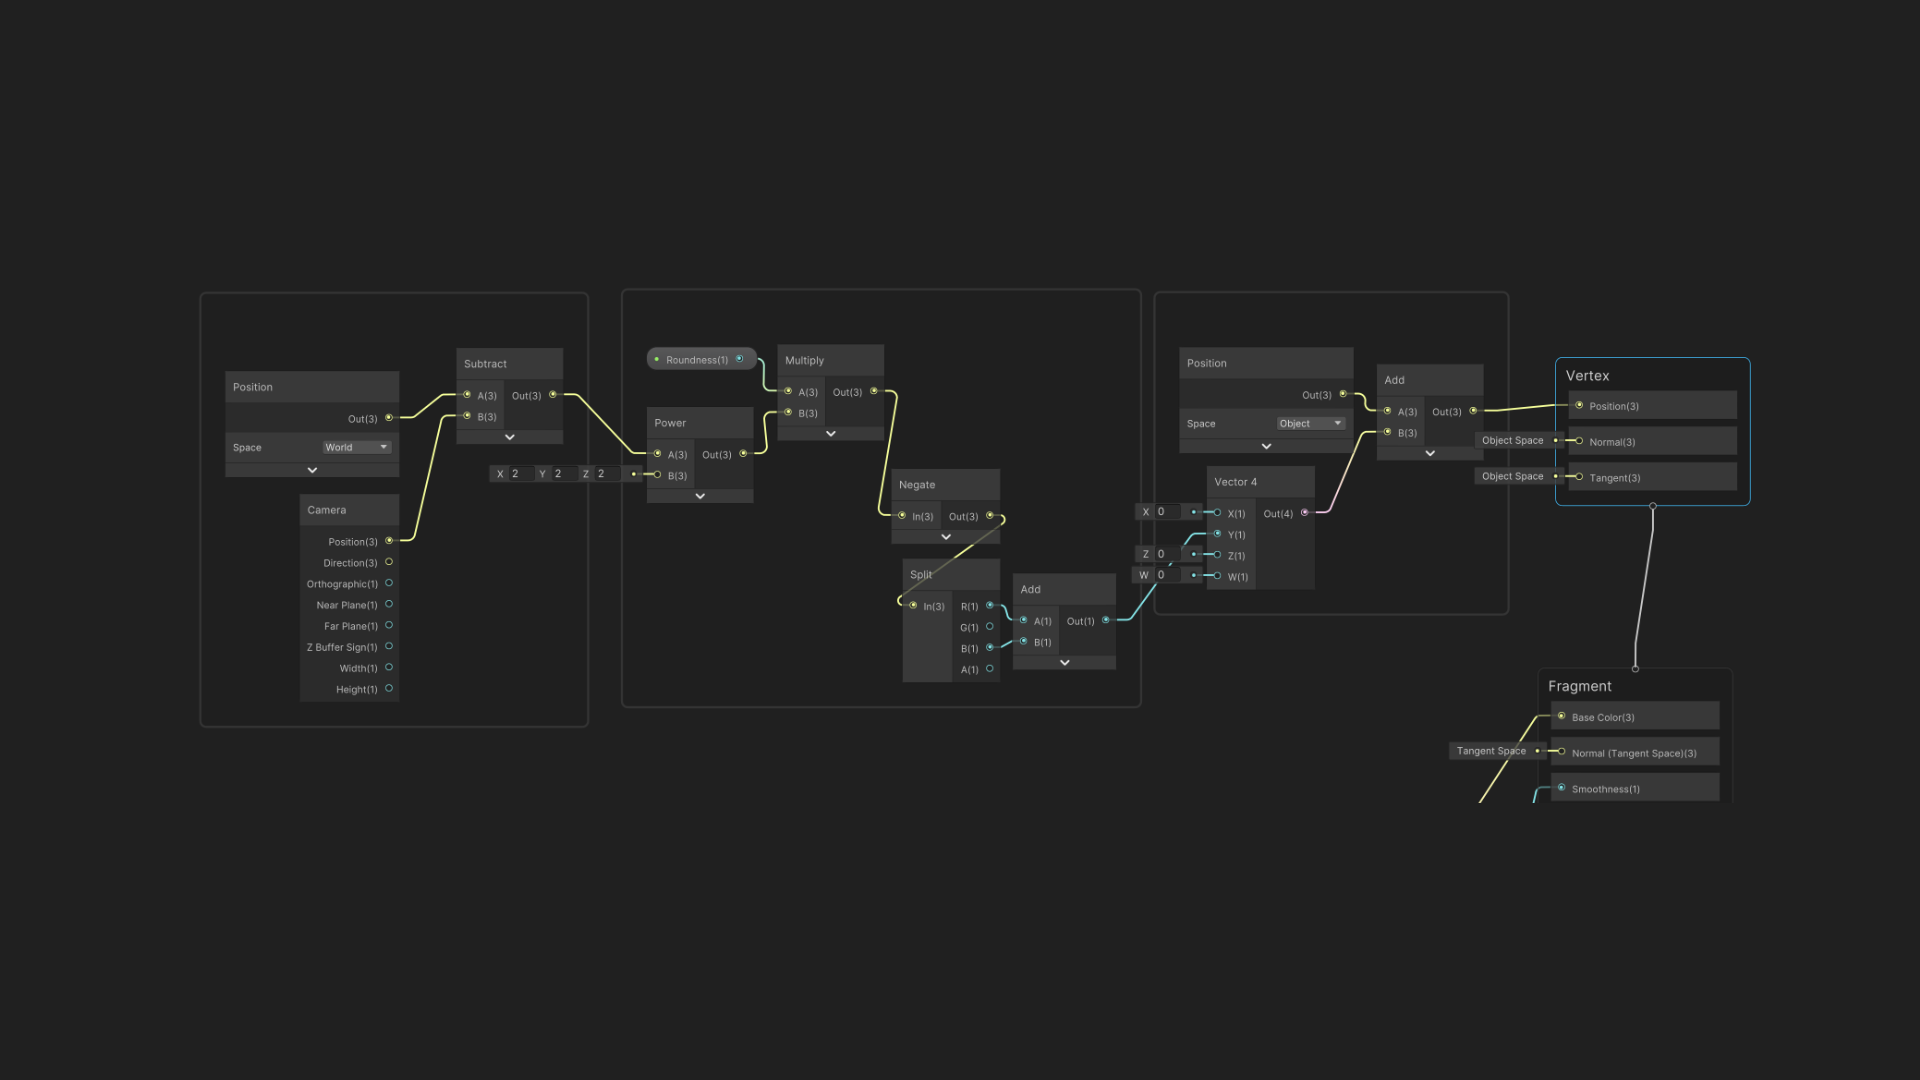
Here we place the sum of X and Z coordinates from the previous step into a new Vector4 (we could have used Vector3) as its Y coordinate so that we can easily add it to the Position of the Object (in Object space).
Since the value is negated we should always get the curvature that goes from the center downwards (even if Y itself is negative) - see the below graph.
Here is how you would apply texture and color to your shader for the sake of completness:

And that is it! Now just create a material out of your shader and apply it to the objects that you want to curve

I hope that you have enjoyed this blog post!
If you did be sure to check my Unity video courses at courses.sunnyvalleystudio.com/ if you want to learn more and support my work.
You can also check my free Unity tutorials at youtube.com/c/SunnyValleyStudio
You can also support me through Patreon:

If you agree or disagree let me know by joining the Sunny Valley Studio discord channel :)
Thanks for reading!
Peter